What is Mono Connect?
Connect is a Mono-hosted authorization flow that works seamlessly across browsers and devices to make accessing your users' financial accounts secure and easy.
What is the Connect Widget?
The Mono Connect widget is our UI component used to effect account linking.
It allows you to securely authenticate a user's financial account and returns an authentication code for the user. This code is then exchanged (with the Exchange Token endpoint) for an account ID representing the same user.
You can then use this account id with your secret key generated from the app on your Mono dashboard to call Mono financial data APIs like bank statements.
Using Mono without the Connect Widget
Although the Mono Connect widget comes prebuilt by Mono, we also provide access to the API that powers it to generate the same authentication code returned by the widget which you can then use to retrieve an account ID (as seen earlier) and interact with Mono's APIs.
This gives you the ability to create an entirely unique and new experience tailored to your specific needs from simple cases (such as finer control over UI and styling or an extra verification step before final login during onboarding) to more complex cases (such as using Mono's APIs in building a USSD solution).
We've outlined the process for using the Partner's API without the Widget below:
Base URL


1. Register an account with Mono (https://app.withmono.com/register)
2. Use your Mono registered email and password to authenticate the partners API. This returns an access token that will be used with the rest of the API calls.
3. Create an app on the Mono dashboard (https://app.withmono.com/dashboard) or you can send the name of the app(and optionally: a url to the icon and a display name for your users) to the app endpoint. This creates an app in sandbox mode.
Endpoint:

Body:

Response:
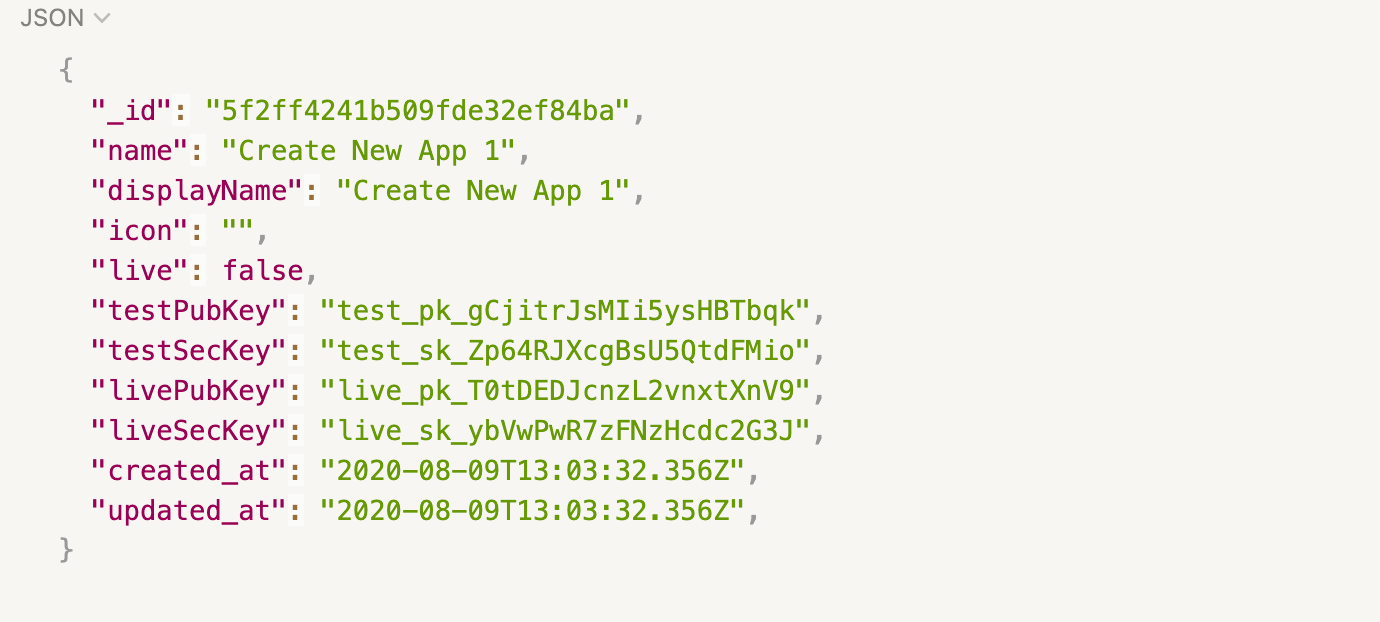
You can update and delete apps by passing in the app ID, which is returned when an app is created, as a query parameter to the app endpoint during the corresponding call.
Endpoint:

Response:

You can also switch to live mode by setting the live boolean which is returned after the app is created to true and sending it to the app endpoint with the app ID passed in as a query parameter.

4. Set up the institutions you'd like to display by retrieving the list of institutions available from the institution's endpoint and using the UI object returned in the response as a guide for implementing your interface
Endpoint:

Response:
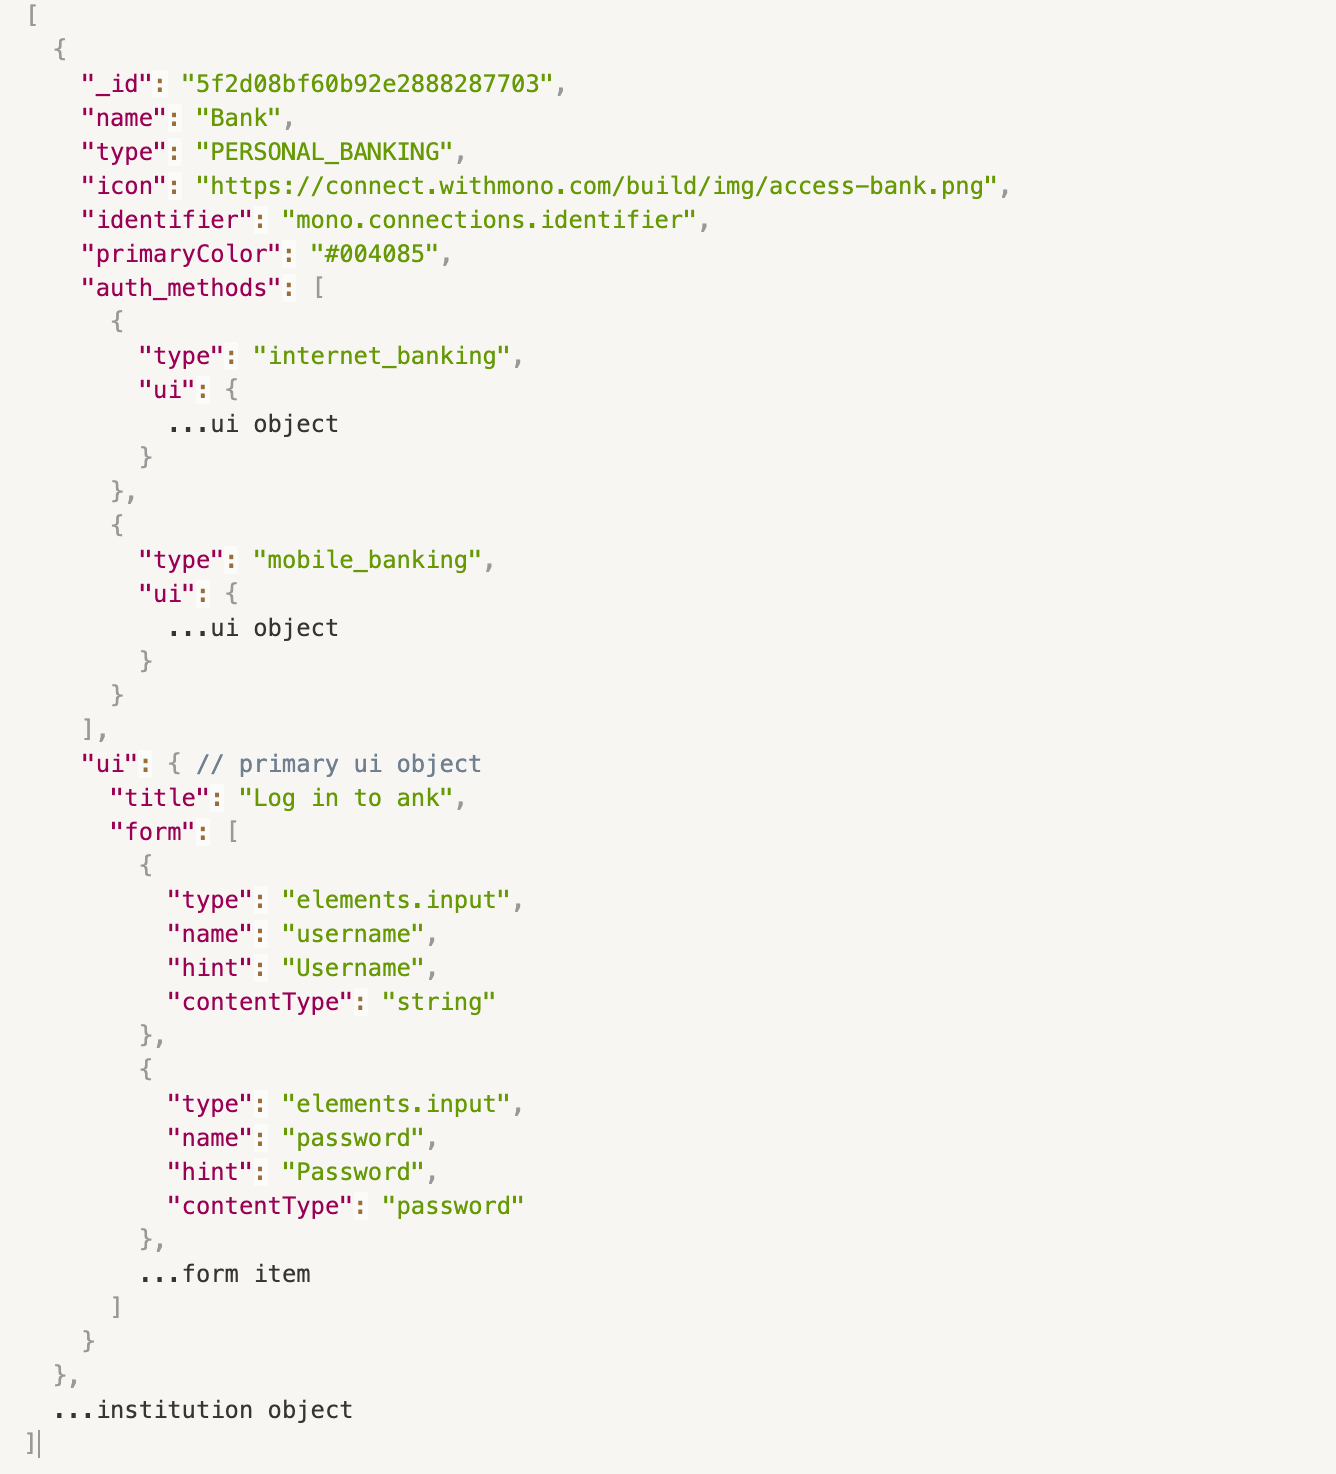
5. Create a Connect session using the appID, institutionID and also the authentication method. The response includes a session ID and an UI object.
Endpoint:

Body:

Response:
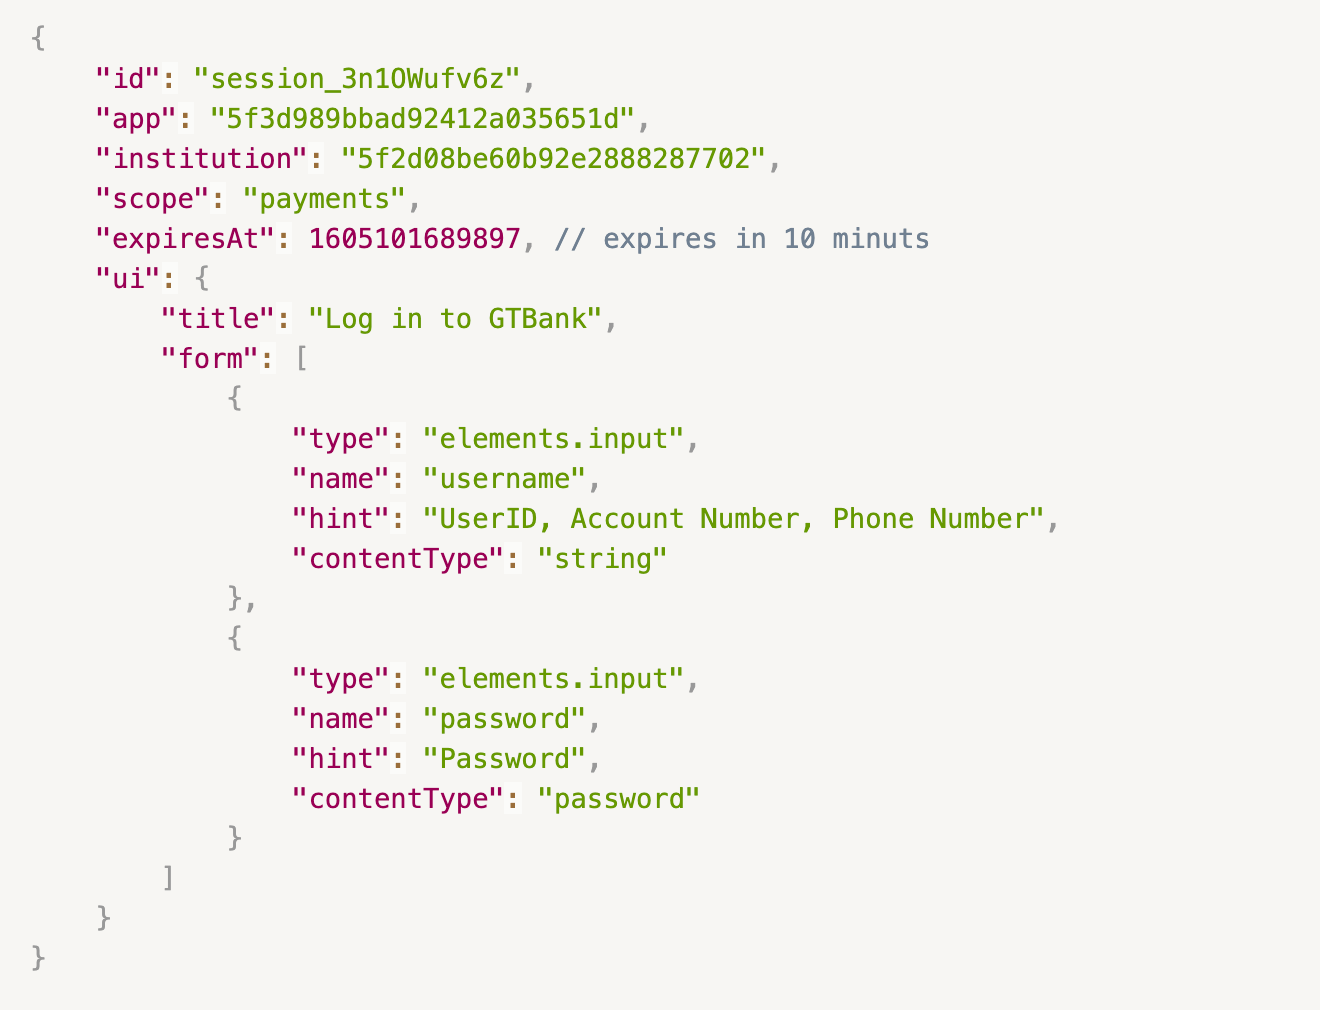
6. You can then log the user in by passing the session ID in the header and body parameters as specified in the UI object, to the connect/login endpoint.
Endpoint:

Request header:

Body:

Response:
If account authorization is successful, the login returns an identification code which can then be exchanged for the account ID.

For users with multiple accounts, a list of all accounts is sent back and their selection is confirmed by a session commit and the authorization code is returned.
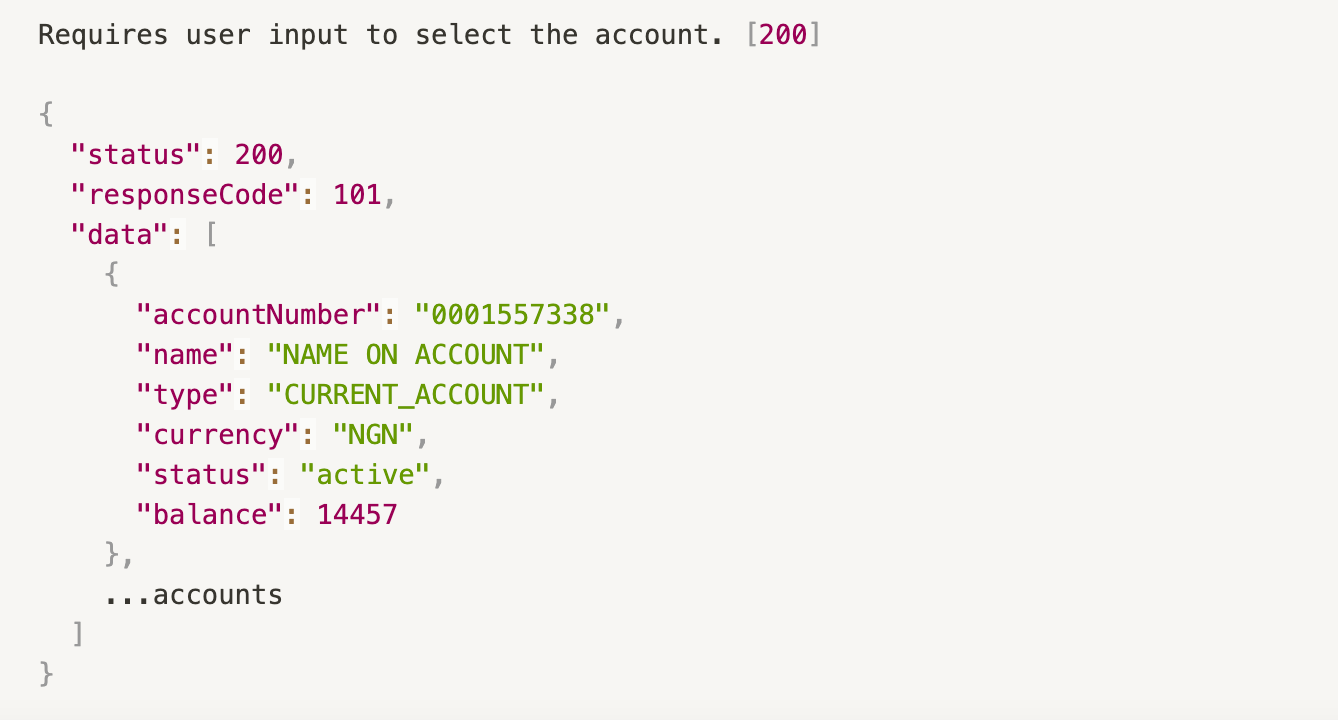
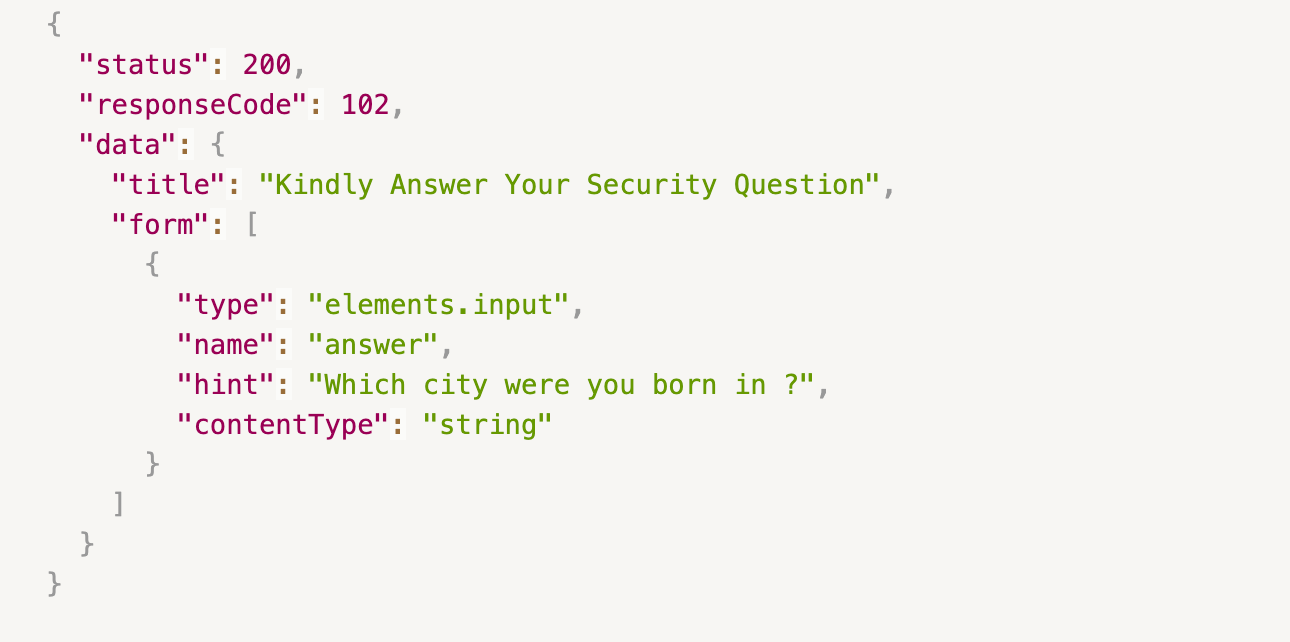
For users with MFA, logging in provides a UI object in the response with the required authentication method. This should be displayed to the users and upon successful authentication, the session is confirmed by a commit, and the authorization code is returned.
To commit:

Body:

Response(success/failure):


